
How to Propagate Spider Plants: A Simple Guide to Growing from Pups
Spider plants (Chlorophytum comosum) are a classic houseplant favourite, known for their arching leaves and easy-care nature. One of the best things about spider plants is their ability to produce “pups”—small plantlets that dangle from the mother plant. These pups make spider plants incredibly easy to propagate, even for beginners. In this guide, we’ll walk you through the different methods of propagating spider plants, so you can grow your collection or share these charming plants with friends.
Why Propagate Spider Plants?
Spider plants are not only beautiful but also incredibly generous when it comes to propagation. Here’s why you should propagate your spider plant:
- Easy to grow: Spider plant pups are already miniature plants, making propagation straightforward.
- Cost-effective: Grow new plants for free instead of buying them.
- Great for sharing: Spider plants make wonderful gifts for friends and family.
- Revitalize your plant: Removing pups can help the mother plant focus its energy on new growth.
What You’ll Need
Before you start, gather these supplies:
- A healthy spider plant with pups
- Clean scissors or pruning shears
- Small pots or containers
- Well-draining potting soil
- Water
- Optional: rooting hormone (to speed up root growth)
Step-by-Step Guide to Propagating Spider Plants
Step 1: Identify Healthy Pups
Look for spider plant pups that are at least 2-3 inches long and have a few small roots starting to form. These are mature enough to be propagated. Avoid pups that are too small or have no roots, as they may not survive on their own.
Step 2: Choose Your Propagation Method
There are three main methods for propagating spider plants:
- Propagating in Soil
- Propagating in Water
- Propagating While Attached to the Mother Plant
Let’s explore each method in detail.
Method 1: Propagating Spider Plants in Soil
This is the most common and straightforward method.
- Remove the Pup:
Gently cut the pup from the mother plant using clean scissors or pruning shears. Make sure to include the small roots at the base of the pup. - Prepare the Pot:
Fill a small pot with well-draining potting soil. Moisten the soil slightly so it’s damp but not soggy. - Plant the Pup:
Place the pup in the soil, burying the roots and the base of the plantlet. Gently press the soil around it to secure it in place. - Water Lightly:
Water the soil lightly to help the pup settle in. Be careful not to overwater, as spider plants are prone to root rot. - Place in Indirect Light:
Put the pot in a spot with bright, indirect light. Avoid direct sunlight, which can scorch the young plant. - Care for the New Plant:
Keep the soil lightly moist and wait for the pup to establish itself. In a few weeks, you should see new growth.
Method 2: Propagating Spider Plants in Water
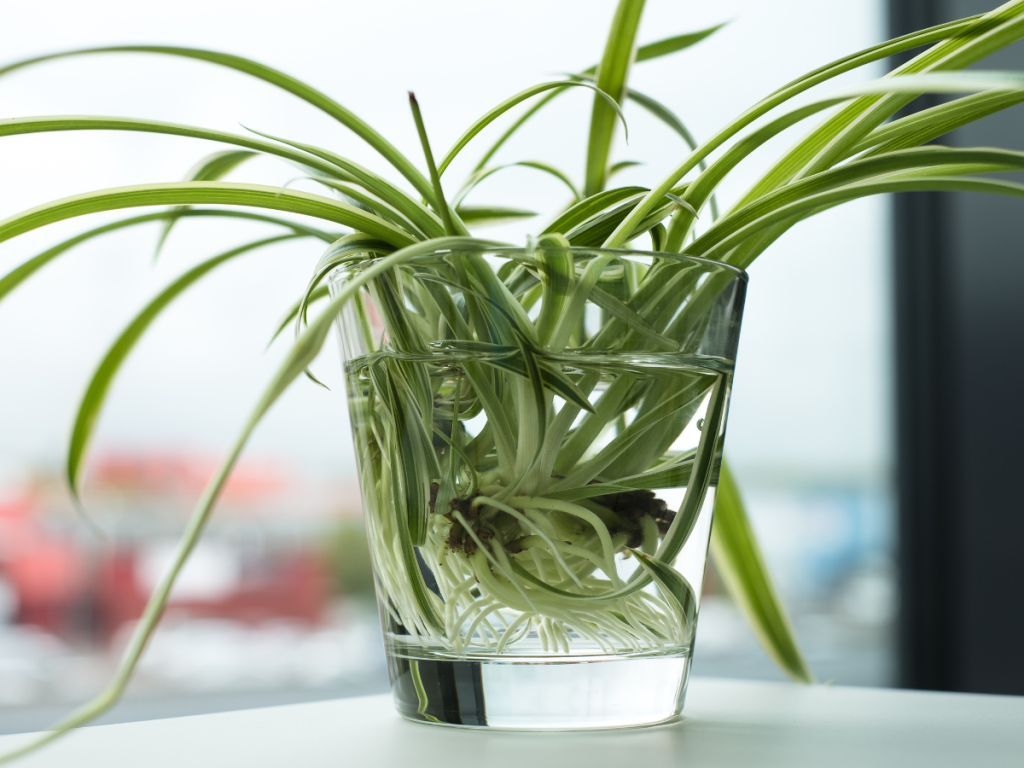
Water propagation is a fun way to watch the roots grow before planting the pup in soil.
- Remove the Pup:
Cut the pup from the mother plant, making sure to include the small roots. - Place the Pup in Water:
Fill a glass or jar with room-temperature water and place the pup inside, ensuring the roots are submerged. Avoid submerging the leaves. - Change the Water Regularly:
Replace the water every 3-4 days to keep it fresh and prevent bacteria growth. - Wait for Roots to Grow:
In 1-2 weeks, you should see the roots growing longer and stronger. Once the roots are about 2 inches long, the pup is ready to be planted in soil. - Transplant to Soil:
Follow the same steps as Method 1 to plant the pup in soil.
Method 3: Propagating While Attached to the Mother Plant
This method allows the pup to root while still attached to the mother plant, giving it a better chance of survival.
- Identify a Pup:
Choose a healthy pup that’s still attached to the mother plant. - Place a Pot Nearby:
Fill a small pot with well-draining soil and place it near the mother plant. - Plant the Pup:
Without cutting the pup, place it on top of the soil in the new pot. Use a bent paperclip or small stake to hold it in place if necessary. - Water Lightly:
Water the soil lightly to help the pup establish roots. - Wait for Roots to Form:
In 2-3 weeks, the pup should develop roots in the new pot. Once rooted, you can cut the stem connecting it to the mother plant.
Tips for Success
- Use Well-Draining Soil: Spider plants prefer soil that doesn’t retain too much water.
- Avoid Overwatering: Keep the soil lightly moist but not soggy.
- Provide Indirect Light: Spider plants thrive in bright, indirect light but can tolerate lower light conditions.
- Be Patient: It can take a few weeks for pups to establish roots and start growing.
Common Questions About Propagating Spider Plants
1. How long does it take for spider plant pups to root?
In soil, pups typically root within 2-3 weeks. In water, roots may appear in 1-2 weeks.
2. Can I propagate spider plants without roots?
While it’s possible, pups with small roots have a higher success rate. If your pup has no roots, try propagating it in water first.
3. Why are my spider plant pups dying?
Pups may die if they’re overwatered, exposed to direct sunlight, or planted in poor-draining soil. Make sure to provide the right conditions for growth.
4. How many pups can I remove at once?
You can remove multiple pups at once, but avoid taking too many, as this can stress the mother plant.
Final Thoughts
Propagating spider plants is a simple and rewarding process that allows you to grow new plants from the pups of your existing spider plant. Whether you choose to propagate in soil, water, or while attached to the mother plant, you’ll love watching your spider plant family grow.
So, grab your scissors, pick a healthy pup, and start propagating your spider plant today!